Video návod
Návod na dokončení modelu F3K.
Nejprve je potřeba připravit křídlo pro vložení serv. Křídlo si položíme jeho spodní stranou nahoru,
na rovnou měkčí podložku, tak aby jsme na něm nezanechali otlaky. Naměříme si 50mm od zařízlé
strany křídla a zhruba v největší hloubce profilu na křídlo přiložíme servo. U verze PRO, to bude ihned za D-BOXem.
F3K ( DLG ) SHARKZuerst muss man den Flügel für die Servos vorbereiten. Legen Sie den Flügel mit derUnterseite nach oben auf eine weiche Unterlage (es dürfen keine Druckspuren bleiben). Platzieren Sie den Servo 50mm von der Schnittkante der Tragfläche an der stärkstenStelle des Flügels. Bei der PRO-Version befindet sie sich direkt hinter der D-BOX.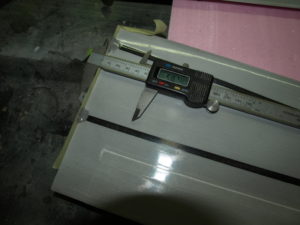
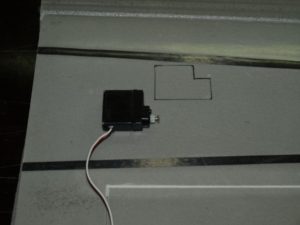
Obkreslíme jeho obrys na potah křídla.
Perořízkem prořízneme potah i z částí jádra křídla. Pozor ať křídlo neprořízneme!
Zeichnen Sie die Kontur des Servo auf die Oberfläche des Flügels.
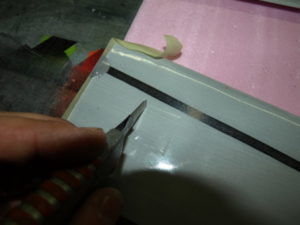
Úzkými kleštěmi vyštípeme otvor pro servo.
Schneiden Sie vorsichtig die obere Schale mit einem Teppichmesser aus.
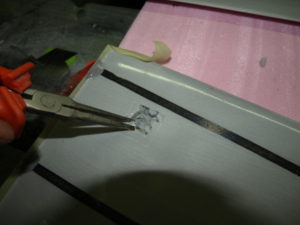
Povrch se poté začistí kupříkladu plochým šroubovákem.
Die Oberfläche glättet man z.B. mit einem flachen Schraubenzieher aus.
Mit einer engen Zange sticht man das Loch für Servomotor aus.

Die Bodenfläche z.B. mit einem flachen Schraubenzieher glätten.
An der Stelle der Servos ist doppelter Glasfaserverstärkter Kunststoff,
trotzdem vorsichtig arbeiten.
Trubičkou od zlomené antény vyvrtáte díru pro kabel serva.
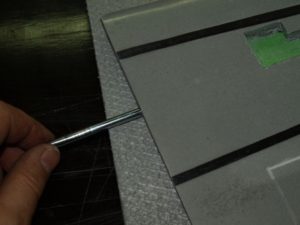
V místě serv je zdvojená skelná tkanina, nicméně je potřeba pracovat opatrně, aby se nepoškodil potah křídla. poté z boku vyvrtáme díru pro kabel serva. Z úspěchem k tomu používám nabroušenou trubičku ze zlomené prutové antény. Dále vyřízneme nad dírou čtverec pro vyvedení konektorů serv.
Die Bodenfläche z.B. mit einem flachen Schraubenzieher glätten. An der Stelle der Servos ist doppelter Glasfaserverstärkter Kunststoff, trotzdem vorsichtig arbeiten.
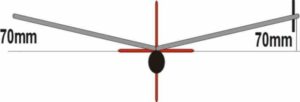
Nyní můžeme začít se spojením polovin křídla. Přichystáme si rovnou podložku. Důležité je, aby nebyla zkroucená. Dále 2 ks podložek kterými se vypodloží konce křídel do správného vzepětí. Opět je důležité, aby byly rovnoběžné. Každá strana křídla se vypodloží o 70 mm. Na jednu polovinu křídla nalepíme maskovací pásku.
Polovina křídla se umístí na podložku a její konec se vypodloží o oněch 70 mm. Na spoj naneseme epoxidové lepidlo a obě poloviny spojíme.
Jetzt kann man mit der Flügelverbindung beginne. Dazu braucht man auf einer glatten Unterlage zwei Unterleger an den Tragflächenspitzen für die richtige V-Form. Es ist wichtig, dass sie parallel zueinander und nicht verdreht sind. Jedes Flügelende wird dabei um 70 mm hochgelegt. Kleben Sie nun auf einen Flügel von unten ein Klebeband.
Für die Verbindung der beiden Hälften wird Epoxidkleber benötigt.

Druhá polovina bude též vypodložena o 70 mm. V této fázi je velmi důležité, aby se jednotlivé poloviny spojily tak, aby křídlo nebylo překroucené. Přebytečný epoxid z horní strany se setře. Na spodní straně nám stečení lepidla brání vlepená maskovací páska. Zatím si můžeme připravit igelitovou fólii, na které budeme sytit tkaninu pro zalaminování spoje křídla. Dodávaná tkanina 48g/m se na spoj použije ve třech vrstvách. Tři vrstvy tkaniny položíme na připravený igelit a pomocí molitanového válečku, nebo jen pomocí kousku molitanu je prosytíme dodanou pryskyřicí . Ta se rozmíchává v hmotnostním poměru uvedeném na obalu. ( 100:30 ) Jedná se o hmotnostní poměr a pro přelaminování stačí cca 5g.
Es ist sehr wichtig, dass der Flügel nicht verdreht ist. Entfernen Sie den überflüssigen Klebstoff von der Oberseite, auf der Unterseite schützt das Klebeband.
Auf einer Plastikfolie wird das Gewebe zum Laminieren des Flügels gelegt. Das mitgelieferte Gewebe (48g/m2) wird in zwei oder drei Schichten verarbeitet. Dazu werden zwei Schichten auf die Folie gelegt und das Harz mit einem Schaumgummi aufgetragen. Das Harz wird im Verhältnis 100:30 gemischt. Für das Laminieren reichen ca. 5g.
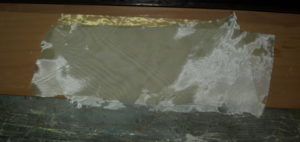
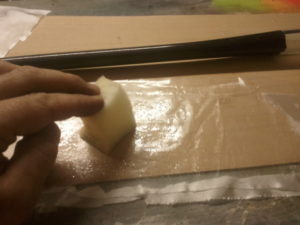
Na prosycenou tkaninu přiložíme igelitovou folii. Nyní máme připravenou tkaninu tak, aby se dala nůžkami zastřihnou na požadovaný rozměr tak, aby se nám nedeformovala. Zastřihneme pásku širokou cca 60 mm a dlouhou cca 180 mm. Opatrně z jedné strany sundáme igelitovou folii. Nyní tkaninu můžeme přitisknout na spoj křídla. Po přitisknutí se sundá i druhá folie.
Auf das laminierte Gewebe wird eine weitere Plastikfolie gelegt. Jetzt wird das Gewebe-Patch geschnitten, 60mm breit und 180mm lang. Von einer Seite wird vorsichtig die Folie entfernt. Das Gewebe wird auf die Flügelverbindung gedrückt. Danach wird auch die zweite Folie entfernt.
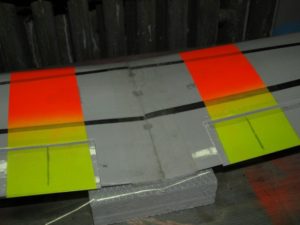
Dále papírovou utěrkou odstraníme přebytečnou pryskyřici.
Das überflüssige Harz wird mit einem Papiertuch aufgenommen, dazu wird das
Papiertuch ohne seitliche Bewegung auf die Flügel gedrückt.
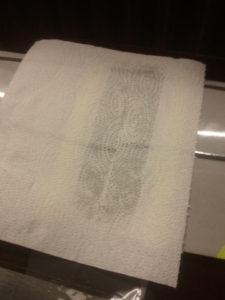
Das gleiche wird auch auf der Unterseite gemacht.
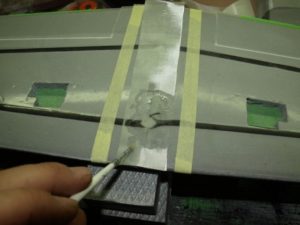
Nach dem Trocknen kann das überflüssige Gewebe wegschnitten werden.
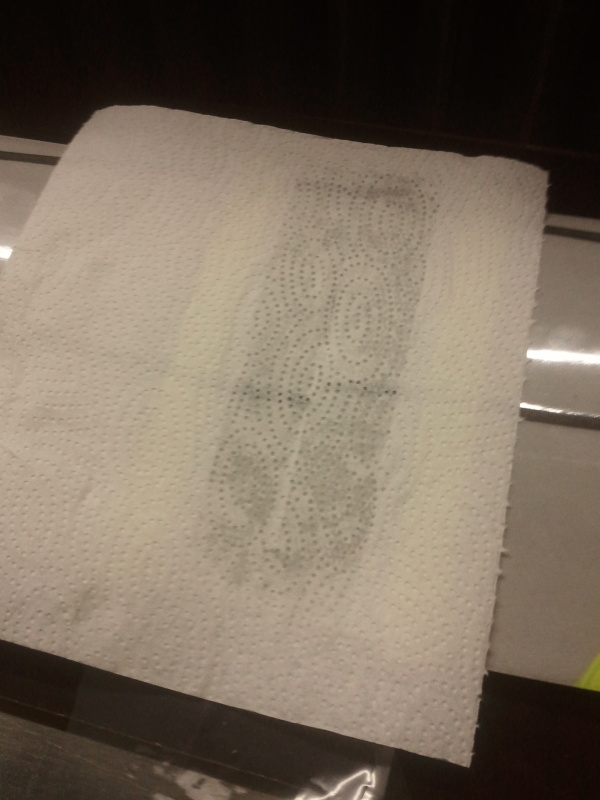
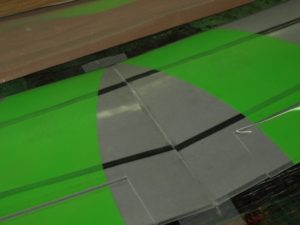
Provádí se to tak, že se utěrka přiloží a přitiskne bez pohybu do strany. Tkanina se tímto krokem přitiskne k povrchu křídla. Stejný postup se provede i na spodní straně křídla. Po zatvrdnutí pryskyřice se případná přečnívající tkanina zastřihne.
Man drückt ohne Seitenbewegung das Papiertuch auf die Flügel. Das gleiche macht man auch auf der Unterseite. Nach dem Trocknen kann man den überflüssigen Stoff wegschneiden.
Nyní můžeme provrtat díry o průměru 3 mm pro šrouby uchycení křídla. V křídle jsou vylaminované výztuhy pro oporu hlavy šroubů. Přední šroub je vzdálen 35 mm od náběžné strany křídla. Úhel náběhu by tak měl být cca 1,5 st. Šroubem přitáhneme křídlo k trupu. Nyní křídlo srovnáme tak, aby bylo kolmé k trupu. Pak je možno vyvrtat druhou díru. Při jejím naměření si můžeme pomoci tak, že mezi křídlo a trup vložíme malou placičku plastelíny. Po přitisknutí křídla se do ní obtiskne přesná poloha matice. Poté se může vyvrtat druhá díra.
Jetzt werden die Löcher für die Schrauben mit 3mm Durchmesser gebohrt. Im Flügel ist eine Unterstützung für die Schrauben eingebracht. Die vordere Schraube ist 35mm von der Flügelvorderkante entfernt. Das Bohrloch ist ca. 1,5 Grad geneigt. Mit den Schrauben wird der Flügel mit dem Flugzeugskörper verbunden. Der Flügel muss senkrecht zum Flugzeugrumpf sein. Dann wird das zweite Loch ausgemessen (z.B. Mit einer Hilfe von Knetmasse).
Dále se může přilaminovat SOP. Tento krok je dobré dělat při již přichyceném křídle Jen tam je možno dosáhnout kolmosti SOP vůči křídlu.
Do SOP v místě uhlíkové výztuhy vyřízneme drážku pro ocasní trubku.
Danach wird das Ruder laminiert (es ist wichtig, dass der Flügel schon befestigt ist.)
In das Ruder wird eine Nut für die Schwanzröhre ausgeschnitten.
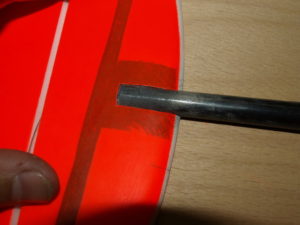
SOP se pak přilepí malým množstvím epoxidového lepidla. Spoj se po vytvrdnutí lepidla přelaminuje stejným postupem, jako spoj křídla.
Das Ruder wird mit Epoxid-Klebstoff senkrecht zur Tragfläche auf die Rumpfröhre geklebt und anschließend wird das Ruder laminiert, gleich wie beim Flügel.
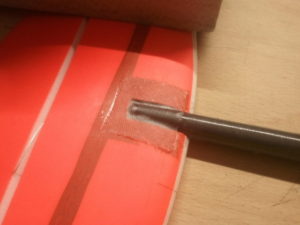
Opět se použijí 2 vrstvy tkaniny. Dále se může zkontrolovat kolmost VOP vůči SOP. Kozlík je možno případně nepatrně přibrousit tak, aby se upravila kolmost.
Wieder werden zwei Schichten Gewebe verwendet. Die Auflagefläche für das Höhenruder kann man nachschleifen, damit es richtig senkrecht liegt.
Dále se zalepí páky pro ovládání křidélek, směrového a výškového kormidla. Do horního potahu se prořízne drážka.
Danach werden die Anlenkhebel für die Quer-, Seiten- und Höhenruder verklebt. In die obere Schale der Ruder wird eine Nut geschnitten.
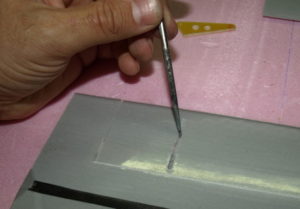
Pomocí vhodného předmětu se odškrábne jádro křídla tak, aby na jedné straně páka protkla potah a na druhé byla přilepena na tupo k potahu. Drážka se vyplní epoxidovým lepidlem a páka se do ní zamáčkne.
Der Kern wird vorsichtig entfernt. Die Nut wird mit Klebstoff gefüllt und danach werden die Anlenkhebel hineingedrückt.
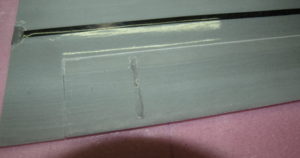
U VOP a SOP provedeme instalaci pružinky. Pružinka musí být co nejblíže u páky, jinak dochází vlivem protiběžných sil k překrucování kormidel. Díru pro pružinku je vhodné nejprve propíchnout např. špendlíkem. Pružinka se následně potře epoxidovým lepidlem a zamáčkne do připraveného otvoru.
Beim Höhenruder und Seitenruder wird die Feder installiert. Die Feder muss möglichst nah zur Anlenkung sein, sonst verfälscht der Einfluss der Gegendrehkräfte die Ruder. Das Loch für die Feder wird mit einer Stecknadel vorbereitet. Anschließend wird das Loch mit Epoxid-Klebstoff gefüllt und die Feder hineingedrückt.
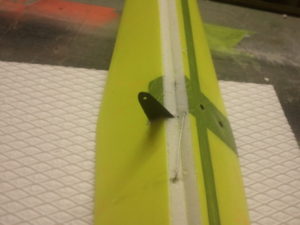
Dále vyvrtáme díru pro házecí kolík na levé straně křídla v místě, kde se spojují uhlíkové pásnice a cca 1,5cm cm od konce křídla. Kolík se lepí epoxidovým lepidlem a před tímto krokem je nutno ho v místě lepeného spoje lehce zdrsnit smirkokým papírem. Při samotném zalepení kolíku nejprve naneste lepidlo na stěny vyvrtané díry. Pak se může kolík vložit do vyvrtaného otvoru, otře se lepidlo z házecího kolíku a poté se vytvoří koutový spoj okolo celého kolíku. Kolík musí být rovnoběžný s SOP !
Áls nächstes wird ein Loch für den Wurfstift auf der linken Seite des Flügels am Kohlenstoff-Patch ca. 1,5cm cm von dem Ende des Flügels entfernt gebohrt. Den Stift verklebt man (davor mit Schmirgelpapier aufrauen), indem Klebstoff in das Loch gefüllt wird. Der überschüssige Klebstoff wird abgewischt und dann eine Kehlnaht um den gesamten Stift ausgebildet. Der Stift muss parallel zum Seitenruder sein!

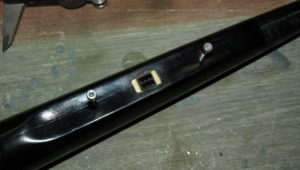
Nyní je možno osadit model elektroinstalací. Do trupu vyfrézujeme otvor pro konektory serv pro křidélka. Přiložená destička z překližky s otvorem slouží k přichycení servo konektorů. Vlepíme do ní dvě koncovky servo prodlužek ( samice ) vedle sebe. Celé to pak zalepíme
epoxidovým lepidlem do otvoru v trupu.
Náhon serv tvoří kevlarová šňůra dodávaná spolu s modelem. Vybavení tvoří obvykle přijímačová baterie Ni-Mh 360 mAh a 4,8V. Tu umístěte co nejvíce do špice modelu.
Jetzt kann die Elektroinstallation beginnen. In den Rumpf wird ein Loch für die Steckverbindungen der Querruder-Servos gefräst. Beiliegendes Sperrholz-Plättchen dient zur Befestigung der Steckverbindungen am Rumpf. Die beiden Steckbuchsen werden zunächst miteinander und am Plättchen verklebt. Das ganze wird dann mit dem Rumpf verklebt.

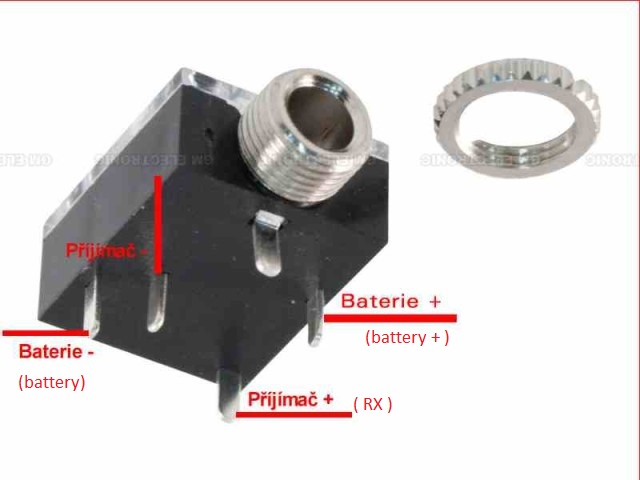
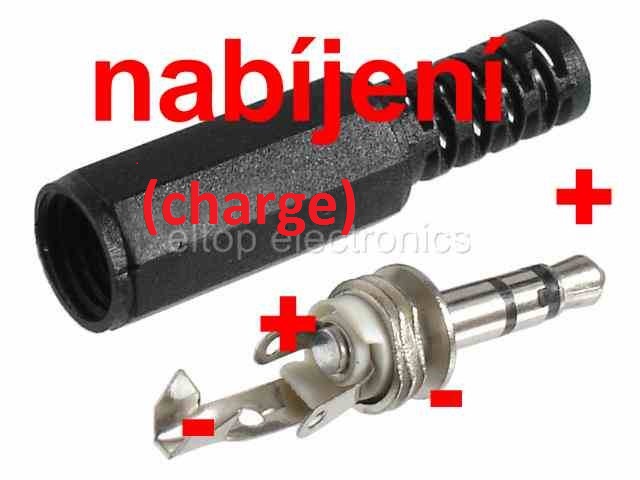
Vypínač a napájecí konektor tvoří jack stereo konektor podle následujícího zapojení. Umístíme jej do díry kterou vyvrtáme před kabinu trupu.
Die Anlenkung für das Seiten- und Höhenruder erfolgt über die beigelegte Kevlarschnur. Möglichst in der Rumpfspitze kommt eine Batterie NI-MH 360 mAh und 4,8 V zum Einsatz.
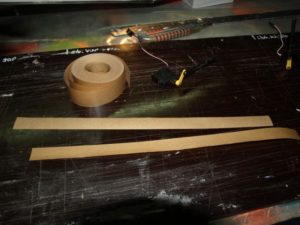
Na křidélka doporučuji serva DYMOND D60 ( případně KST X08N V5 ) . Serva pro křidélka se obalí páskou s papíru natřeného disperzním lepidlem či papírovou lepící páskou. Dejte více závitů… Takto obalená serva se zalepí do otvoru v trupu. Díky pásce půjdou případně lehce vydat… Je NUTNÉ , aby byly ukotvené na spodním, i horním potahu křídla. Na horním potahu stačí na každé straně kapka lepidla. Torzní tuhost se pak rozvede mezi potahykřídla.
Für die Flügelchen empfehle ich Servo DYMOND D60 ( alternativ KST X08N V5 ) . Die Servo packt man in die Papierbinde mit klebstoff ein. So eingepackte Servo klebt man in das Loch im Flugzeugskörper. Dank der Binde kann man es wieder gut rausholen. Es ist nötig, dass es oben und unten im Flügelbelag befestigt ist.
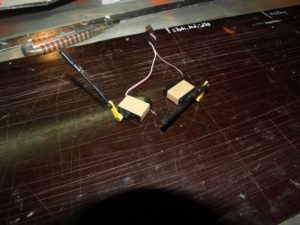
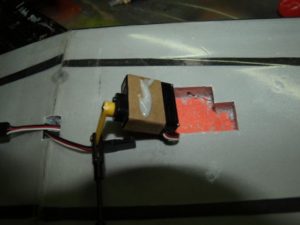
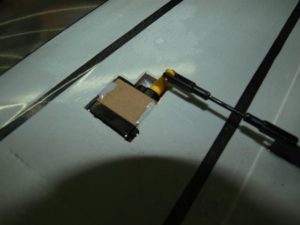
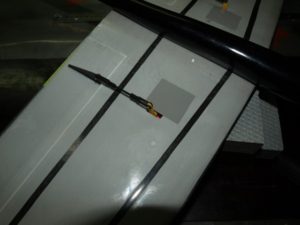

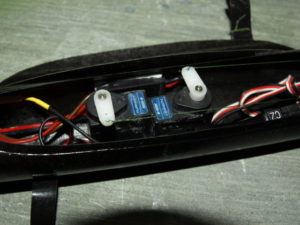
Na VOP a SOP se obvykle dává servo DYMOND D47. Serva v trupu uchycuji tak, že jim odbrousím úchyty a s slepím je přes destičku balzy k sobě. To samé provedu na spodní straně serv a tento celek pak vlepím do trupu. Balza mi zajistí případnou opravitelnost tím, že jdou serva případně lehce vylomit a znovu zalepit. Tento postup je hmotnostně lepší než vlepení případného držáku serv a zcela vyhovuje. Navíc po straně zbude místo pro přijímač.
Těžiště modelu nastavte tak, by bylo 70 mm od náběžné hrany. Nicméně je to těžistě vhodné pro zálet a musí se případně doupravit. F3K je na správné nastavení těžiště velmi háklivé. Z baterií NiMh 360mA vychází těžiště obvykle bez dovážení.
Dále doporučuji nastavit režim pro hod modelu tak, aby byly křidélka cca 2mm nahoru a výškovka mírně ,,potlačeno,, Nutno vyzkoušet a doladit tak, aby model stoupal pod ustáleným úhlem. Další letové režimy jsou brzdy, křidélka dolů cca 45st. a potlačená výškovka. Pro let v termice se používá režim termika. Křidélka cca 2mm dolů. Při všech režimech je nutno zkusmo stanovit kompenzaci klopivého momentu pomocí mixu výškovky.
Důležité upozornění a rady na závěr: Křídlo i ocasky jsou s extrudovaného polystyrenu a nesmí se lepit lepidly na bázi rozpouštědel či většinou vteřinových lepidel. Potah letadla je háklivý na otlaky, trup je vyroben z vysokomodulárního uhlíku který je pevný, ale křehký. Vyvarujte se úderům či tlaku na něj. Může se porušit ztruktura materiálu a poté může dojít k poškození či zlomení trupu. Tyto vlastnosti jsou dány maximálními požadavky na nízkou váhu letadla. Při přistání je dobré model krátce před dosednutím mírně potlačit tak, aby nedopadl na SOP, ale na přední část trupu. Přistání do ruky je samozřejmě ideální, ale i při něm lze při špatném zachycení modelu možno jej poškodit.
Na závěr Vám chci popřát spoustu příjemných chvil strávených s modelem !
Für ruder und aufzug benutzt man Servo DYMOND D47.
Den Schwerpunkt justieren sie so, dass es cca 70mm von der Kante ist. Dies ist der Schwerpunkt für den Anfang und man sollte es dann selber einstellen. FK3 ist sehr empfindlich.
WICHTIG!
Flügel und Hinterflügelchensind aus extrudierten Styropor und man darf die nicht mit Sekundenkleber und Kleber auf eine Lösungsmittelbasis kleben.
Der Flugzeug Belag ist Druckempfindlich. Der Körper ist aus Hochmodularen Carbon hergestellt, der stabil aber zerbrechlich ist. Vermeiden Sie Schläge oder starken Druck. Man könnte die Struktur beschädigen und dadurch zum Körperbruch kommen. Diese Eigenschaften entstehen durch die Ansprüche auf minimales Flugzeuggewicht. Bei der Landung ist es gut, wenn das Flugzeug nicht auf ruder landet, sondern auf den vorderen Teil des Körpers. Ideal ist die Handlandung, aber auch hier muss man aufpassen.
Zum Ende möchte ich Ihnen viel Spaß mit dem Flugzeug wünschen